


Wednesday, August 5, 2009
No Longer in the Rough: A Review of the HTC Touch Diamond 2
Posted by Don Tolson in "Pocket PC Hardware" @ 07:00 AM
Software Included
HTC doesn't go out of its way to provide a huge batch of additional software, but what they do add provides improvements and extensions beyond what is found within the Windows Mobile operating system. For the Touch Diamond 2 package, HTC added:
- Opera Mobile;
- YouTube;
- Windows Live;
- RSS Hub;
- Google Maps;
- JBlend (midlet manager); and
- SIM Manager.
Battery
The Touch Diamond 2 is powered by a 1100mAh LiIon battery. Having heard the complaints about the original Touch Diamond's dismal battery life, HTC has upped the ante by over 20% to meet the extra power demands of the larger screen, and keep things running through a busy work day. For my own experience, I found the battery lasted between 3 and 4 days between charges, but I never let it drain below about 15%. GPS is always a battery burner and life will be shorter if 3G phone/data connections are implemented. I think mine may have lasted longer because I was only able to make Edge connections. Recharging with the wall charger from about 20% to full took about 4 hours. Charging via USB took considerably longer, but that's to be expected, since the screen stays on.
Camera
Two cameras are included in the model provided for our review -- the 5mp with autofocus and zoom on the back, and a smaller VGA front-facing one for video calling. (I imagine the front one will probably be excluded on the North American models.)
The 5 megapixel camera on the back is very good for a phone. It takes clear pictures and is very easy to use, with intuitive controls.
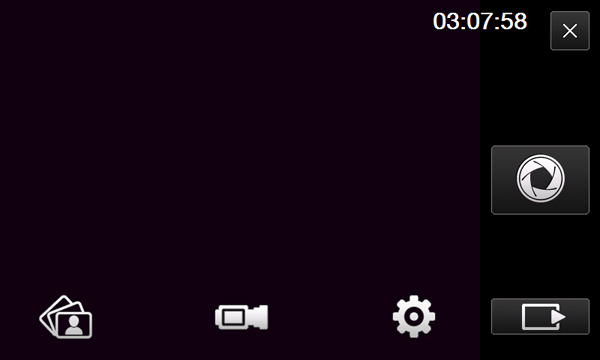
Figure 27: Here is the main screen of the camera application. I don't know about you, but I understood these icons immediately. From left to right they are: Album, Video, Settings, Advanced, Take Picture (middle of right) and Exit. In the top right is the current time which can be stamped on each image, if desired. To use the zoom feature of the camera, you touch and move the zoom bar at the (now) right side of the screen.
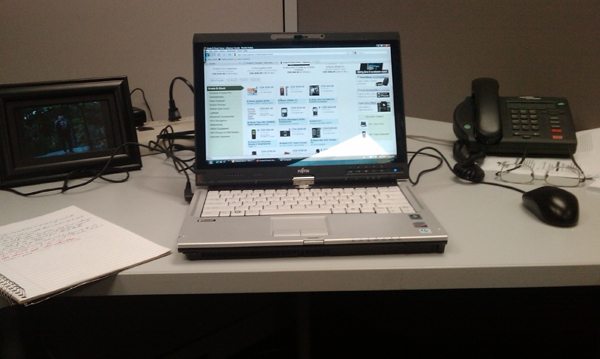
Figure 28: Here's a picture taken by the 5mp camera. It's indoors, with only fluorescent lighting and the camera's white balance set to 'auto'.

Figure 29: Here's the same picture, with the white balance set to 'fluorescent'. Hmmmm, I thought the white balance was supposed to remove/compensate for the blue cast of fluorescent lights?
The extra width of the pictures provides almost a panoramic view capability.
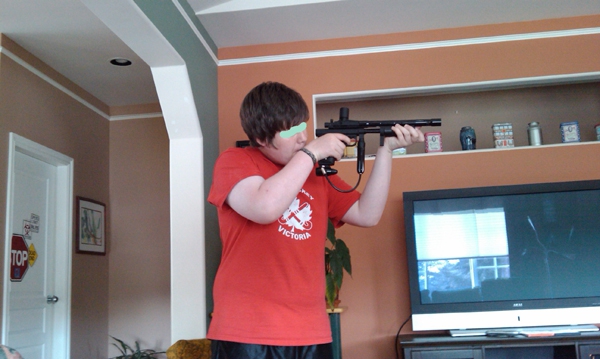
Figure 30: Another indoor shot, but this time with natural light coming in through a window behind me.
Another neat feature I found was that when I attempted to use the above shot of my son as a Contact image, the application automatically created a transparent-grey frame around my son, with the option to move the frame if I wanted!
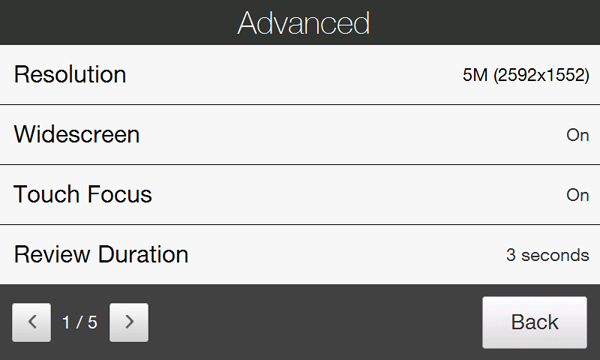
Figure 31: The first of five screens of advanced camera options/configuration. There isn't a lot that's unavailable to set up the way you want it.


